Lesson 2 - Organizing Customers in Groups
In SIPS, you organize your customers into groups.
A group can be organized by geographic area - such as a county, city, or
rate center (which ties to sets of telephone exchange numbers) - and by type of
customer - business or residential.
After you create a group, you select the service packs
that are available to the group.
To add a group:
-
If you have not already logged in, do so now.
-
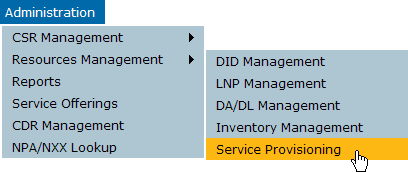
On
the Administration menu, click Resources Management, and then click Service Provisioning.
-
On
the Service Provisioning page, click Group.
The Group page is displayed.
-
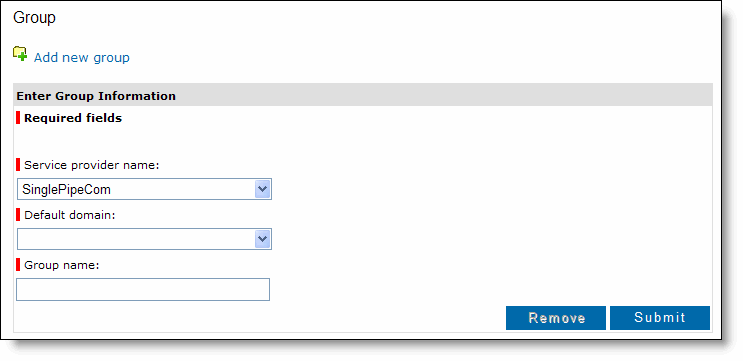
Click
Add new group.

- Your service provider name is already selected. In
Default domain, select a domain to
associate with the group.
The domains were entered by Momentum when setting up
your service provider account.
-
In
the Group name field, enter a
descriptive name for the group. Use a
name that accurately describes the location or purpose of the group.
If you enter more than one word, spaces are converted to underscores (_).
-
Click
Submit.
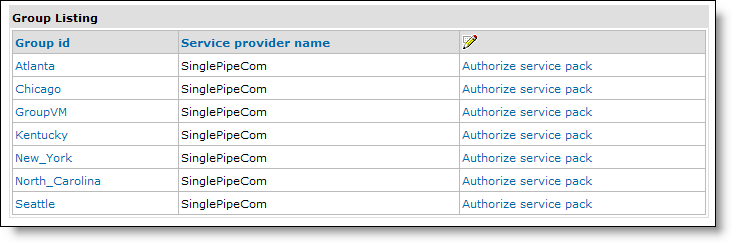
The group is added to the system and is included in the Group Listing.
You should repeat this process until you have added your groups. Then, continue with the next lesson to get telephone numbers.