Lesson 5 - Adding Multiple VoIP Devices
The previous lesson explained how to add VoIP devices, one at a time. This lesson explains how to do a bulk upload - that is, how to upload a spreadsheet containing information for multiple devices. This is a two-part process:
- Create the XLS file
- RPM provides a template for you to use.
- Upload your devices
To create the XLS file:
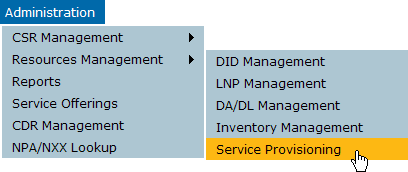
- On the Administration menu, click Resources Management, and then click Service Provisioning.

- On the Service Provisioning page, click Device Management.
The Device Management page is displayed.
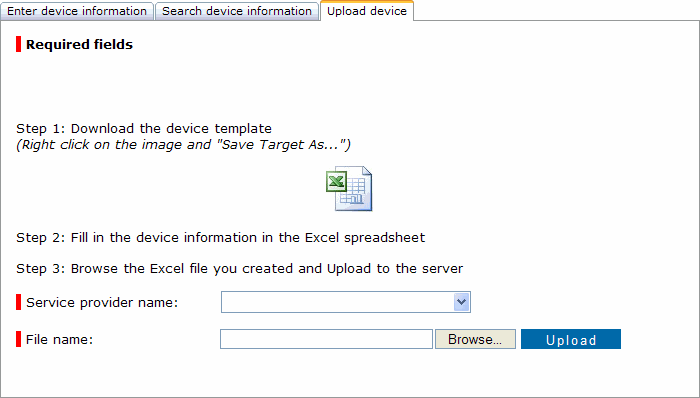
- Click the Upload device tab.

- Right-click the XLS icon and then click Save Target As.
- Save the file to a local drive, and then open the local copy in Excel.
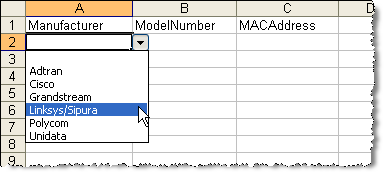
- The XLS has three columns: Manufacturer, ModelNumber, and MACAddress. Click the cell under Manufacturer to display a list of possible manufacturers, and then click the manufacturer name.

- Click the cell under ModelNumber and then click the model number. Make sure the model number belongs to the manufacturer you selected.
- Enter the MAC address.
- Repeat steps 6 through 8 to add more devices.
- Save your changes.
Return to top
To upload and add multiple VoIP devices:
- On the Administration menu, click Resources Management, and then click Service Provisioning.
- On the Service Provisioning page, click Device Management.
The Device Management page is displayed.
- Click the Upload device tab.
- Next to File name, click Browse.
- Browse to the directory where you saved the XLS, select it, and then click Open.
The Upload device tab is displayed again; the file name is completed.

- Click Upload.
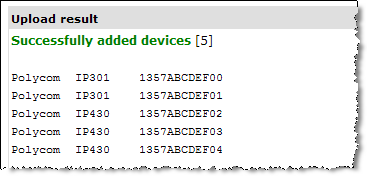
RPM reads the XLS and adds the devices. When finished, it displays a confirmation message:

Before you can provision these devices, they must be assigned to a group. Continue with the next lesson to learn how.


