On the LNP Order page, you enter the telephone number to be transferred and also add the customer to SIPS. Enter the customer’s name, service address, billing address, and DA/DL information.
Notice the ![]() indicators on the page. When you see the red bar next to a field, you must provide information in that field.
indicators on the page. When you see the red bar next to a field, you must provide information in that field.
Important: In the TNs field, enter the telephone number(s) the customer would like to transfer.
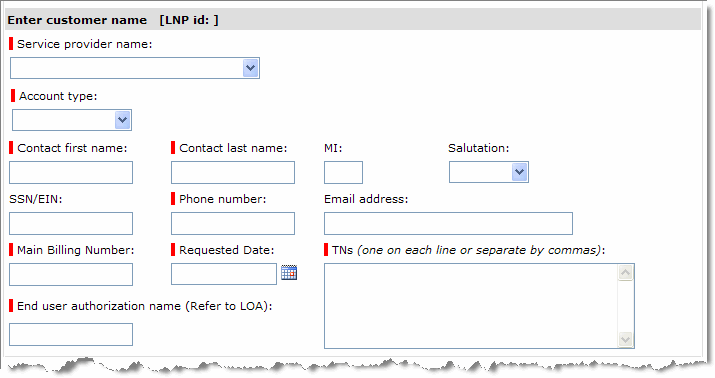
For a detailed explanation of each field, see LNP Order Details.
The service address is critical for ensuring accurate e911 response. To ensure that it is entered correctly, the address fields are broken up into smaller parts: for example, you enter the street number in a separate block from the street name.
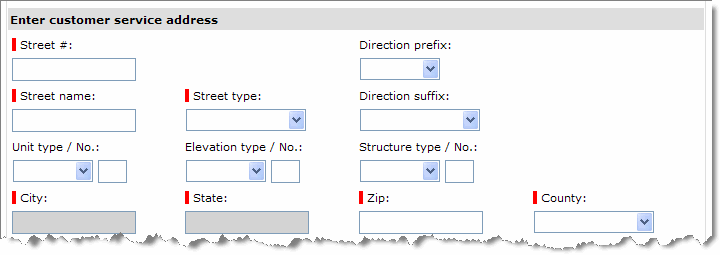
For a detailed explanation of each field, see LNP Order Details.
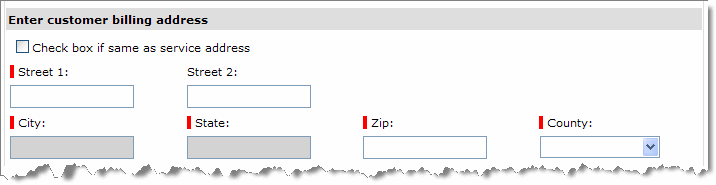
If the billing address is the same as the service address, click the check box.
![]()
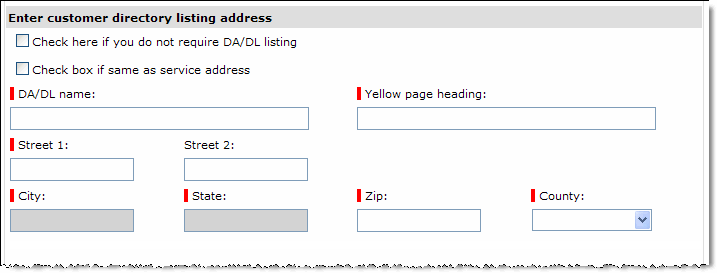

The signature in the uploaded file must match the name you enter in End user authorization name.
The LNP Order page is displayed, with a message indicating that the customer was added to the system.
![]()
If it was successful, a new section is added to the bottom of the page: Enter order information. As it fulfills the LNP request, Momentum completes the various status fields; you can view the LNP order later to check status.
At this point, the request is in the system. Momentum works with the current provider to transfer the number. When the telephone number is ready, you will receve an email message stating the number is ready -- and the time you have to complete provisioning. When you receive this email, continue with the next to set up phone service.
| Lesson 3 - Setting Up Phone Service |